|
A Photo Matte TutorialScrapbooking for Beginners will walk you through the processStep #6 - Matte Your PhotosScrapbooking Basics
To Matte or Not to Matte? |
First Cut
Second & Third Cuts
Forth & Fifth Cuts
While the resulting mattes from the above process are not quite big enough to show under your photos that are also 4 x 6, this is certainly an economical way to get your mattes. So, you can trim 1/4 inch off the short edge and long edge of your photos and they will fit very nicely on top of your mattes....leaving a 1/8 inch border of your matte color to show under your photo. A great frame to make your photos pop off the page.
Horrified at the thought of cutting your photos? Well take a look at them, maybe that 1/4 inch around the edge is not really showing any thing important, just a little extra background. But, there are certainly some I would not cut! I never cut an older photo that I don't have any way to duplicate - but most of today's photos can be trimmed a little on the edges without harming the context or the picture itself.
Important Scrapbooking for Beginners Tip: Don't cut photos you can't get duplicated and never cut a Polaroid as I understand that will damage them.
If you just can't bring yourself to trim your photos and still want to put mattes under them, cut your own out of extra paper or card stock or purchase them in pre-cut "Stacks" of card stock made for that purpose.
You can also get 4 mattes out of an 8 & 1/2 x 11 piece of paper or card stock. Cutting in half each way will yield 4 mattes that are 4 & 1/4 x 5 & 1/2 inches. Here again, you will have to trim your photos if you want to fit them on the mattes, only on the long side, about 3/4 of an inch total. That can be 3/4 inch off one side, or cut some off both sides which totals 3/4 inch.
These mattes are great for the older photos that are smaller and in many varying sizes.
Try this easy Photo Matte Tutorial for
cutting 8 1/2 x 11 inch papers.
cutting 8 1/2 x 11 inch papers.
Photo Matte Tutorial Tip: Another neat way to make your photos pop off the page with mattes, is to ink the edges of the mattes. I usually do this with an ink pad, and just drag the ink pad across the edge of the matte with a color that coordinates with the colors of the layout. I have used both darker and lighter inks.
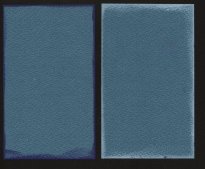
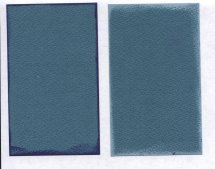
Above are examples of mattes inked with a dark blue and white ink shown with a black background and a white background. You can ink the edges very carefully or you can allow the ink to get on the top surface of the matte which will give a little bit of a distressed look to the mattes and allow any texture of the paper to show even more.
Photo Matte Tutorial Tip: You don't have to stick with only one matte. You can use multiple mattes - two or even three.
This small photo of a fish was cropped to the shape of a tag, then matted in blue, then matted again with copper.
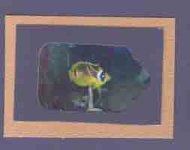
Photo Matte Tutorial Tip: You can put your photos on the mattes centered or off-center, like this cropped fish photo which is swimming away from the scroll work on the right of the matte.
Get Creative and Use Your Imagination.

Photo Matte Tutorial Tip: Your mattes can take on the shape of the photo or a cropped photo like on this layout of the South Carolina Aquarium.
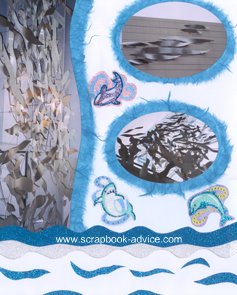
Photo Matte Tutorial Tip: You can also put 2 or more photos on one matte together like the layout below of Alaska's Northern Lights.
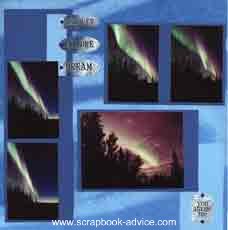
Photo Matte Tutorial Tip: If you cut your own matte sizes and don't want to trim your photos, you will end up with some left over scraps of paper, but you can always use the leftovers to make cards, tags, photos mattes for smaller photos, photo corners, or cut the scraps into very small squares and use them as mattes for your lettering called "lettering blocks" or "header squares".....the list goes on. Using these little pieces will really take your layouts past the scrapbooking for beginners level.
Which is, I imagine, where the term Scrapbooking came from in the first place.
Now that you have finished the Photo Matte Tutorial ...
Move forward to Step #7 - Test Fit Your Layout
from Scrapbooking for Beginners
Check out our other Scrapbook Tutorials
See our Themed & Heritage Scrapbooking for over 70 themed books
The Full 10-Step Quick Start Guide for more Scrapbooking Basics
on our Site?
scrapbook-advice.com?
Check them out for the Spectrum Noir Markers & Storage!
Create More,
Spend Less
at Create For Less
A Great Place to Purchase
all Your Scrapbook Supplies!
Sign up for Forums,
Great Tips,
Classes and Events.

Digital, too!
10 Easy Steps
to a
Great Scrapbook
1. Gather Photos
2. Pick Color
3. Determine Theme
4. Pick the Papers
5. Collect Basic Tools
6. Cut Photo Mattes
7. Test Fit
8. Embellishments
9. Add Journaling
10. Fill your Album
Be Careful About
or Avoid.
Scrapbooking Don'ts
Rubber Stamping Don'ts
Card Making Don'ts
Photography Don'ts
Video formats to DVD's
before they all
fade away with time!
Check out iMempries.com
Scrapbook Storage!
The ScrapRack!


