[?]Subscribe To This Site


|
Alcohol Ink Tutorial& Alcohol Ink StoreI thought it would be handy to provide an Alcohol Ink Tutorial to show just how easy it is to use these great Alcohol Inks from Ranger Industries. Go Directly to our Alcohol Ink Store if you already know how to use the Alcohol Inks.
Supplies needed for Basic Alcohol Ink* Two or three colors of Alcohol Inks and one Metallic Mixative of you have one * * Applicator or Blender Tool * * Felt Pad to use on the Blender Tool * * Blending Solution * * Any non-porous surface to apply the ink to * The Alcohol Ink Applicator or Blender Tool with a felt pad attached to the velcro strip and some spare felt pads. I learned how to use these great products from a demo that I attended, direct from Tim Holtz himself, creative director for Ranger Imdustries. Step 1. Alcohol Ink Tutorial | ||||||||||||||||||||||||||

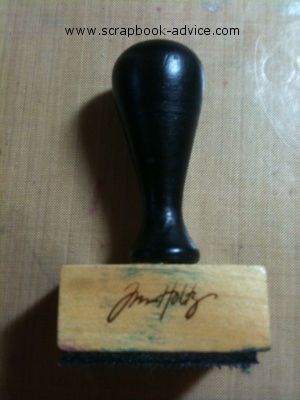 | The Blending Tool looks like the old fashioned rubber stamper with a handle on the top and has Velcro on the flat stamping surface that will hold little rectangles of felt which in turn absorbs the Alcohol Inks. 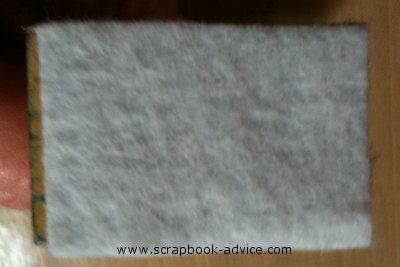  |
Step 3. Alcohol Ink Tutorial
Attach the felt pad to the Velcro at the bottom of the Alcohol Ink Blending Tool.
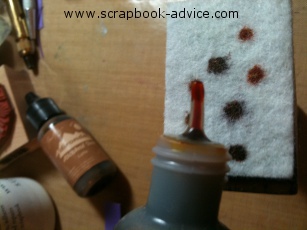 | Hold the Blending Tool with the felt upward, and slowly touch the tip of the Alcohol Ink Bottle to the felt. Gently squeeze a drop into the felt. Actually touching the felt pad with the tip of the bottle will keep the ink from splashing which is critical since this ink will color anything it touches. This is all I use when I am using three colors of Ink. Just a few drops. |
Step 4. Alcohol Ink Tutorial | |
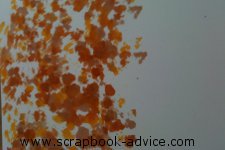 | After adding my 3 colors of coordinating Alcohol Inks to the felt pad, I then tap the felt pad onto the object I want to color. In this case it is a piece of Glossy Cardstock. These drops of Ink have begun to blend together on the right side, the drops on the left side are a few seconds newer. Keep tapping and turning theTool to keep the design from forming a pattern. |
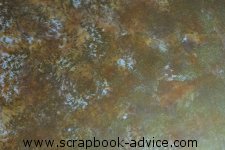 | Here the 3 ink colors have blended into one another and the edges are not so defined. The more I go over the piece of cardstock with the Alcohol Ink Blending Tool, the less defined the colors will be. I can also rub the piece, causing the colors to blend more. |
Step 5. Alcohol Ink Tutorial
Add some of the Blending Solution to the felt pad.
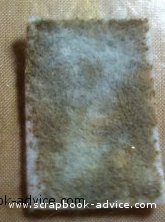 | Here is the Felt Pad with the Alcohol Blending Solution added to the center. Hopefully, you can see where the ink colors have faded out in the shape of a question mark. The Blending solution will do the same thing on your project. |
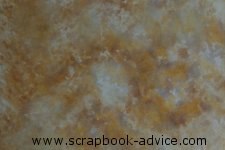 | Here the Alcohol Ink Blending Tool has been tapped once in the center of the Cardstock. Note the white or light spot right in the center. The more you apply, the more the colors will blend and lighten up. You can also apply the Blending Solution directly to your project, but if it's Cardstock, be careful as it may warp. |
Step 6. Alcohol Ink Tutorial | |
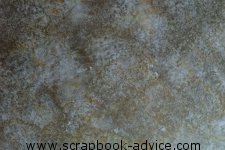 | Here I have added some of the Gold Metallic Mixative. Ranger makes the Metalllic Mixatives in Gold, Silver, Copper and Pearl. Also just recently released is the new Snow Cap, a white dye ink. |
One of the things I love about using the Alcohol Inks on Glossy Card Stock is the fact that the inks are transparent. They dry very quickly and you can still see the glossy part of the card stock and it actually looks like the color is under glass. The Mixatives, however, are not so transparent and do cover a little like paints, but they both blend well together. I find I usually use 3 colors and one Metallix Mixative for each project. | |
Step 7. Alcohol Ink Tutorial
Keep on using the Ink on the pad, moving, tapping and swirling around the project to blend the colors.
STOP whenever you want to.
STOP whenever you like what you have created.
STOP whenever you like what you have created.
Scrapbook-advice.comAlcohol Ink Tip: Once I have used my felt pads for a particular color family, I save it and re-use it several times. I keep one for each family of colors: Blues, Greens, Yellows & Oranges, Browns, Purples, etc.
I have found that evern after several months, just adding some new blending solution to the pad will re-awaken the colors in the inks and I can do several small projects. Remember, however, the colors will not be their original brightness as the solution does fade them out.
After repeated use, the felt pads may tend to get a little fuzzy and may leave pieces on your project. That's when I replace mine.
Wait for your felt pads to dry out before removing them from your Velcro. If dry, they will peel off rather easily in pretty much the same shape. If they are still wet when you go to remove them, they may tear apart and you may not be able to reuse them.
More Samples of Alcohol Ink on Glossy Cardstock
 |  |
 | |
| The first two images use a Purple Alcohol Ink, you can see how the blending of each is different. The Third image has the addition of the Silver Metallic Mixative. | |
I have also seem where these inks can be used with a paint brush, but I prefer the blending that I get with the Alcohol Ink Blending Tool.